
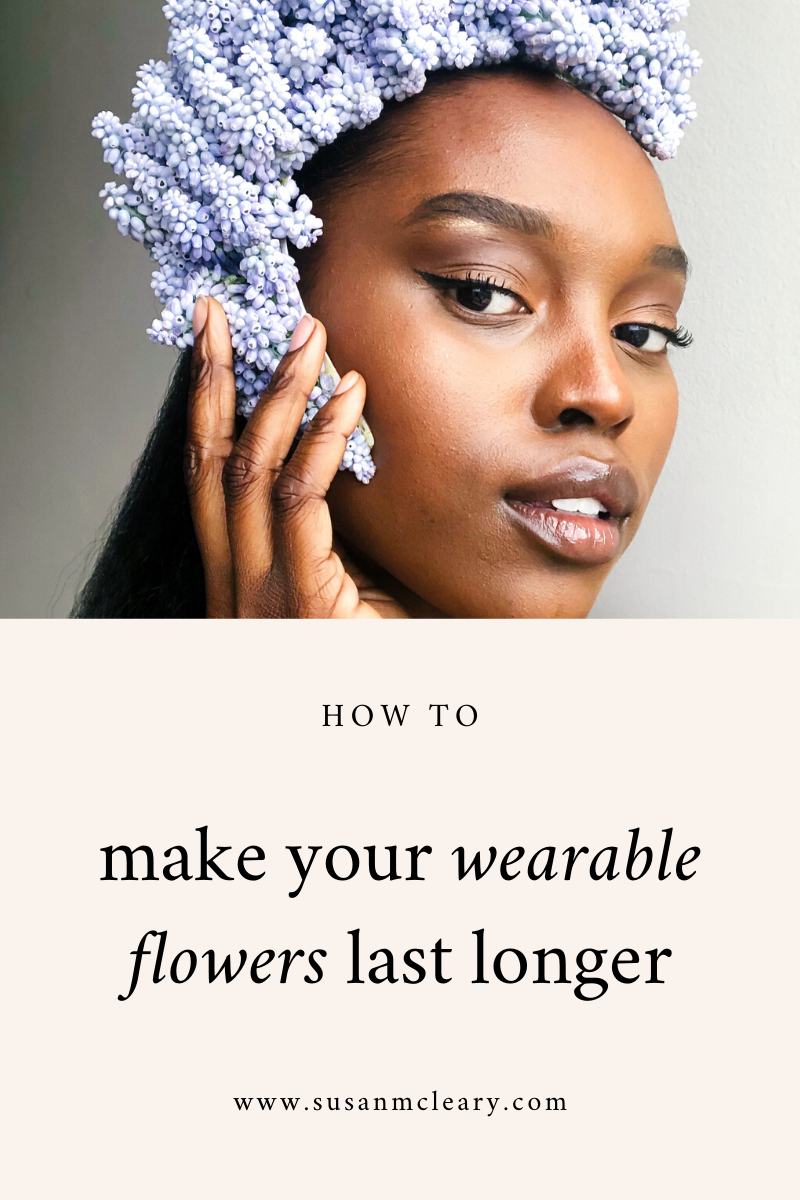
How To Make Your Wearable Flowers Last Longer
This blog post was updated on June 28, 2022. It was originally published on May 19, 2020.
The number one question I receive regarding wearable flowers is “how long will they last?”
I bristle a bit at these comments because I believe that the ephemeral quality of flowers is one of the gifts they offer, teaching us to pause and relish the moment. However, I do think that a floral piece should last at least the length of the event that it’s made to celebrate.
When I first started as a florist, I was taught to make my wearables, spray them with a professional floral finishing spray such as Crowning Glory or Finishing Touch, package them, and store them in the cooler until presentation. This worked well, but I found that the flowers and foliages that responded well to this were somewhat limited. It wasn’t until I spent time learning alongside master florists Gregor Lersch and Hitomi Gilliam, that I discovered the power of the magic box that is the “hydration chamber.” I’m not sure if I made up this name or not, but I certainly did not invent this technique! It’s a time-tested conditioning method that florists have been using for years, that injects flowers and foliages with moisture from the outside in, boosting their longevity dramatically.
How do I make a “hydration chamber”?
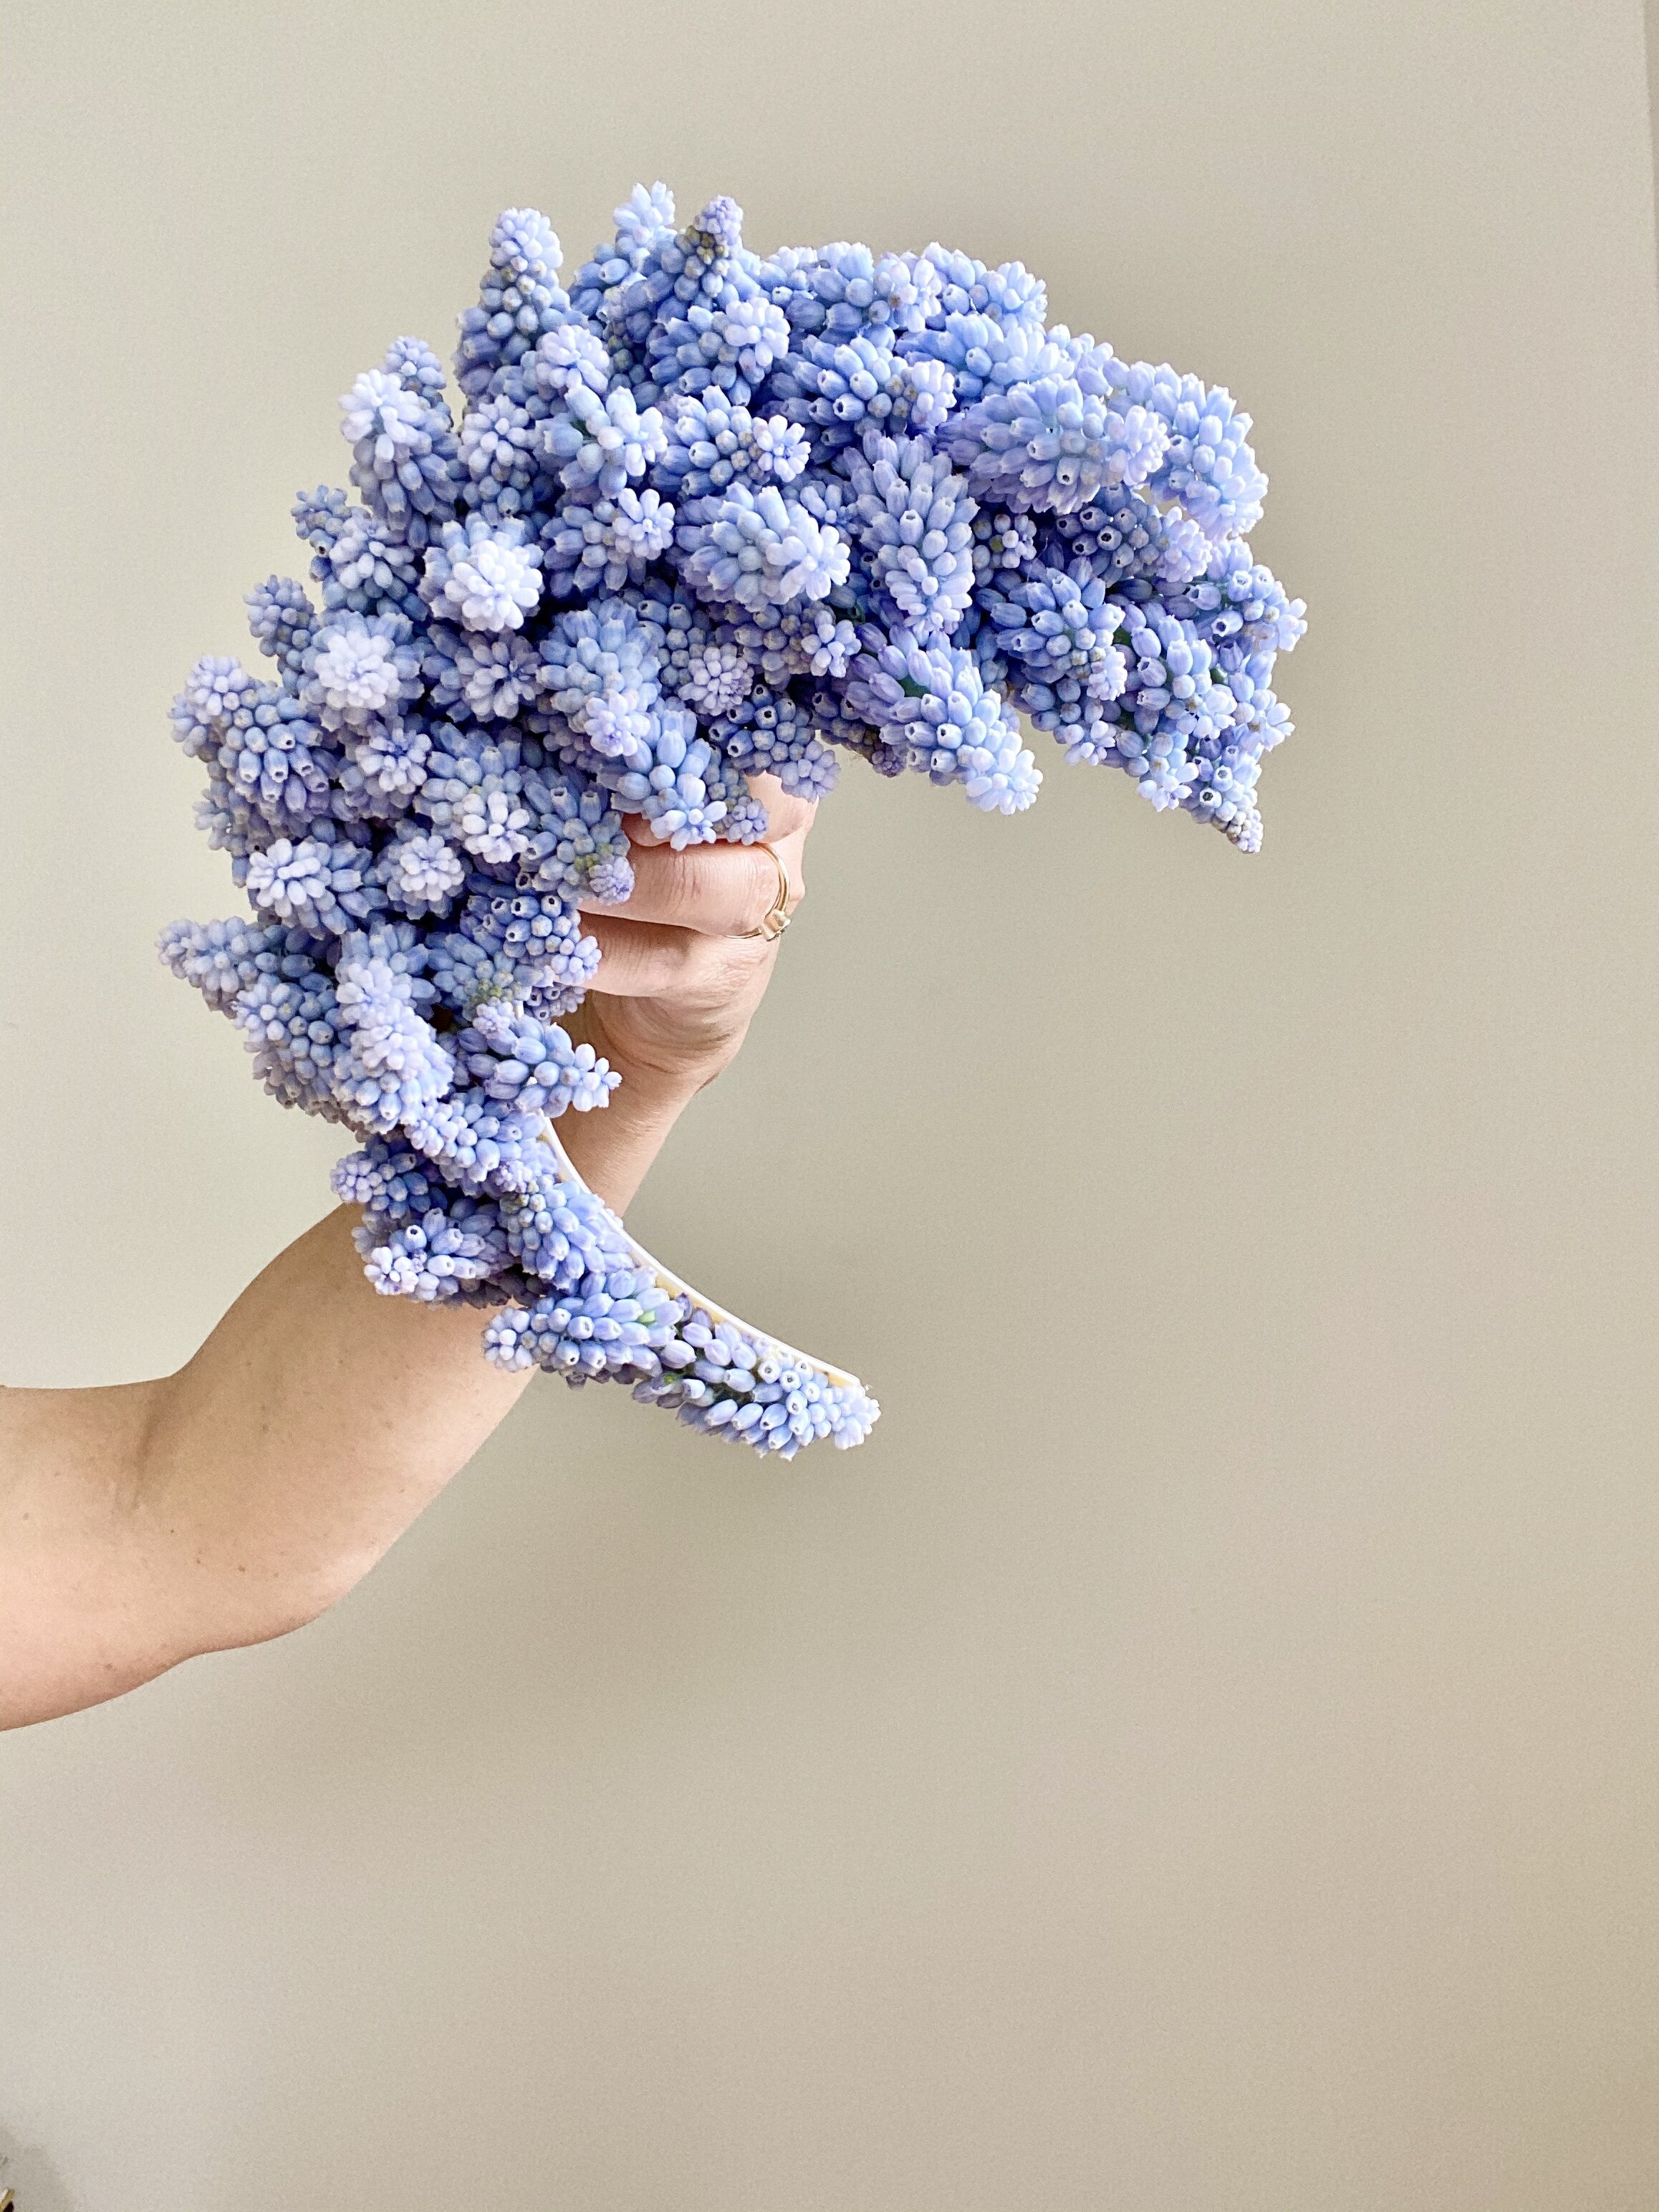
I’m happy to say that making your own hydration chamber is very simple! And you likely have the components knocking about somewhere in your home or studio. It’s as easy as lining any airtight container, like a Tupperware tub with a lid, with damp paper towel (or even packing paper from your flower delivery boxes). After you’ve sprayed the bottom layer with water, lay in cut flowers and foliages, spritz them with water as well, and “put them to bed” with additional layers of damp paper towel. Use your judgement, and don’t over stack your floral layers. Spritz the inside of your container as well, and store in a cool dark place. A floral cooler is ideal, but over the years, I’ve had success with storing in cool barns, garages, basements, and home refrigerators. So, what is the process? Let’s say I’m making a floral necklace for a Saturday wedding. I’d receive my flowers on Wednesday, and like normal, I’d cut them and place them in buckets, allowing them to drink through their stems overnight. On Thursday, I can either cut the flowers ( stem length is typically 2-3” depending on planned use ) and place them in the hydration chamber to plump up, or I can make my floral necklace. It depends on the workflow for that week. Either way, if I make the design on Thursday or Friday, the materials in the piece will spend two days in the hydration chamber environment before going to its party on Saturday. The time you’ve allowed it to uptake moisture through the surface of its petals and leaves will set the piece up to last incredibly well.
Day One:
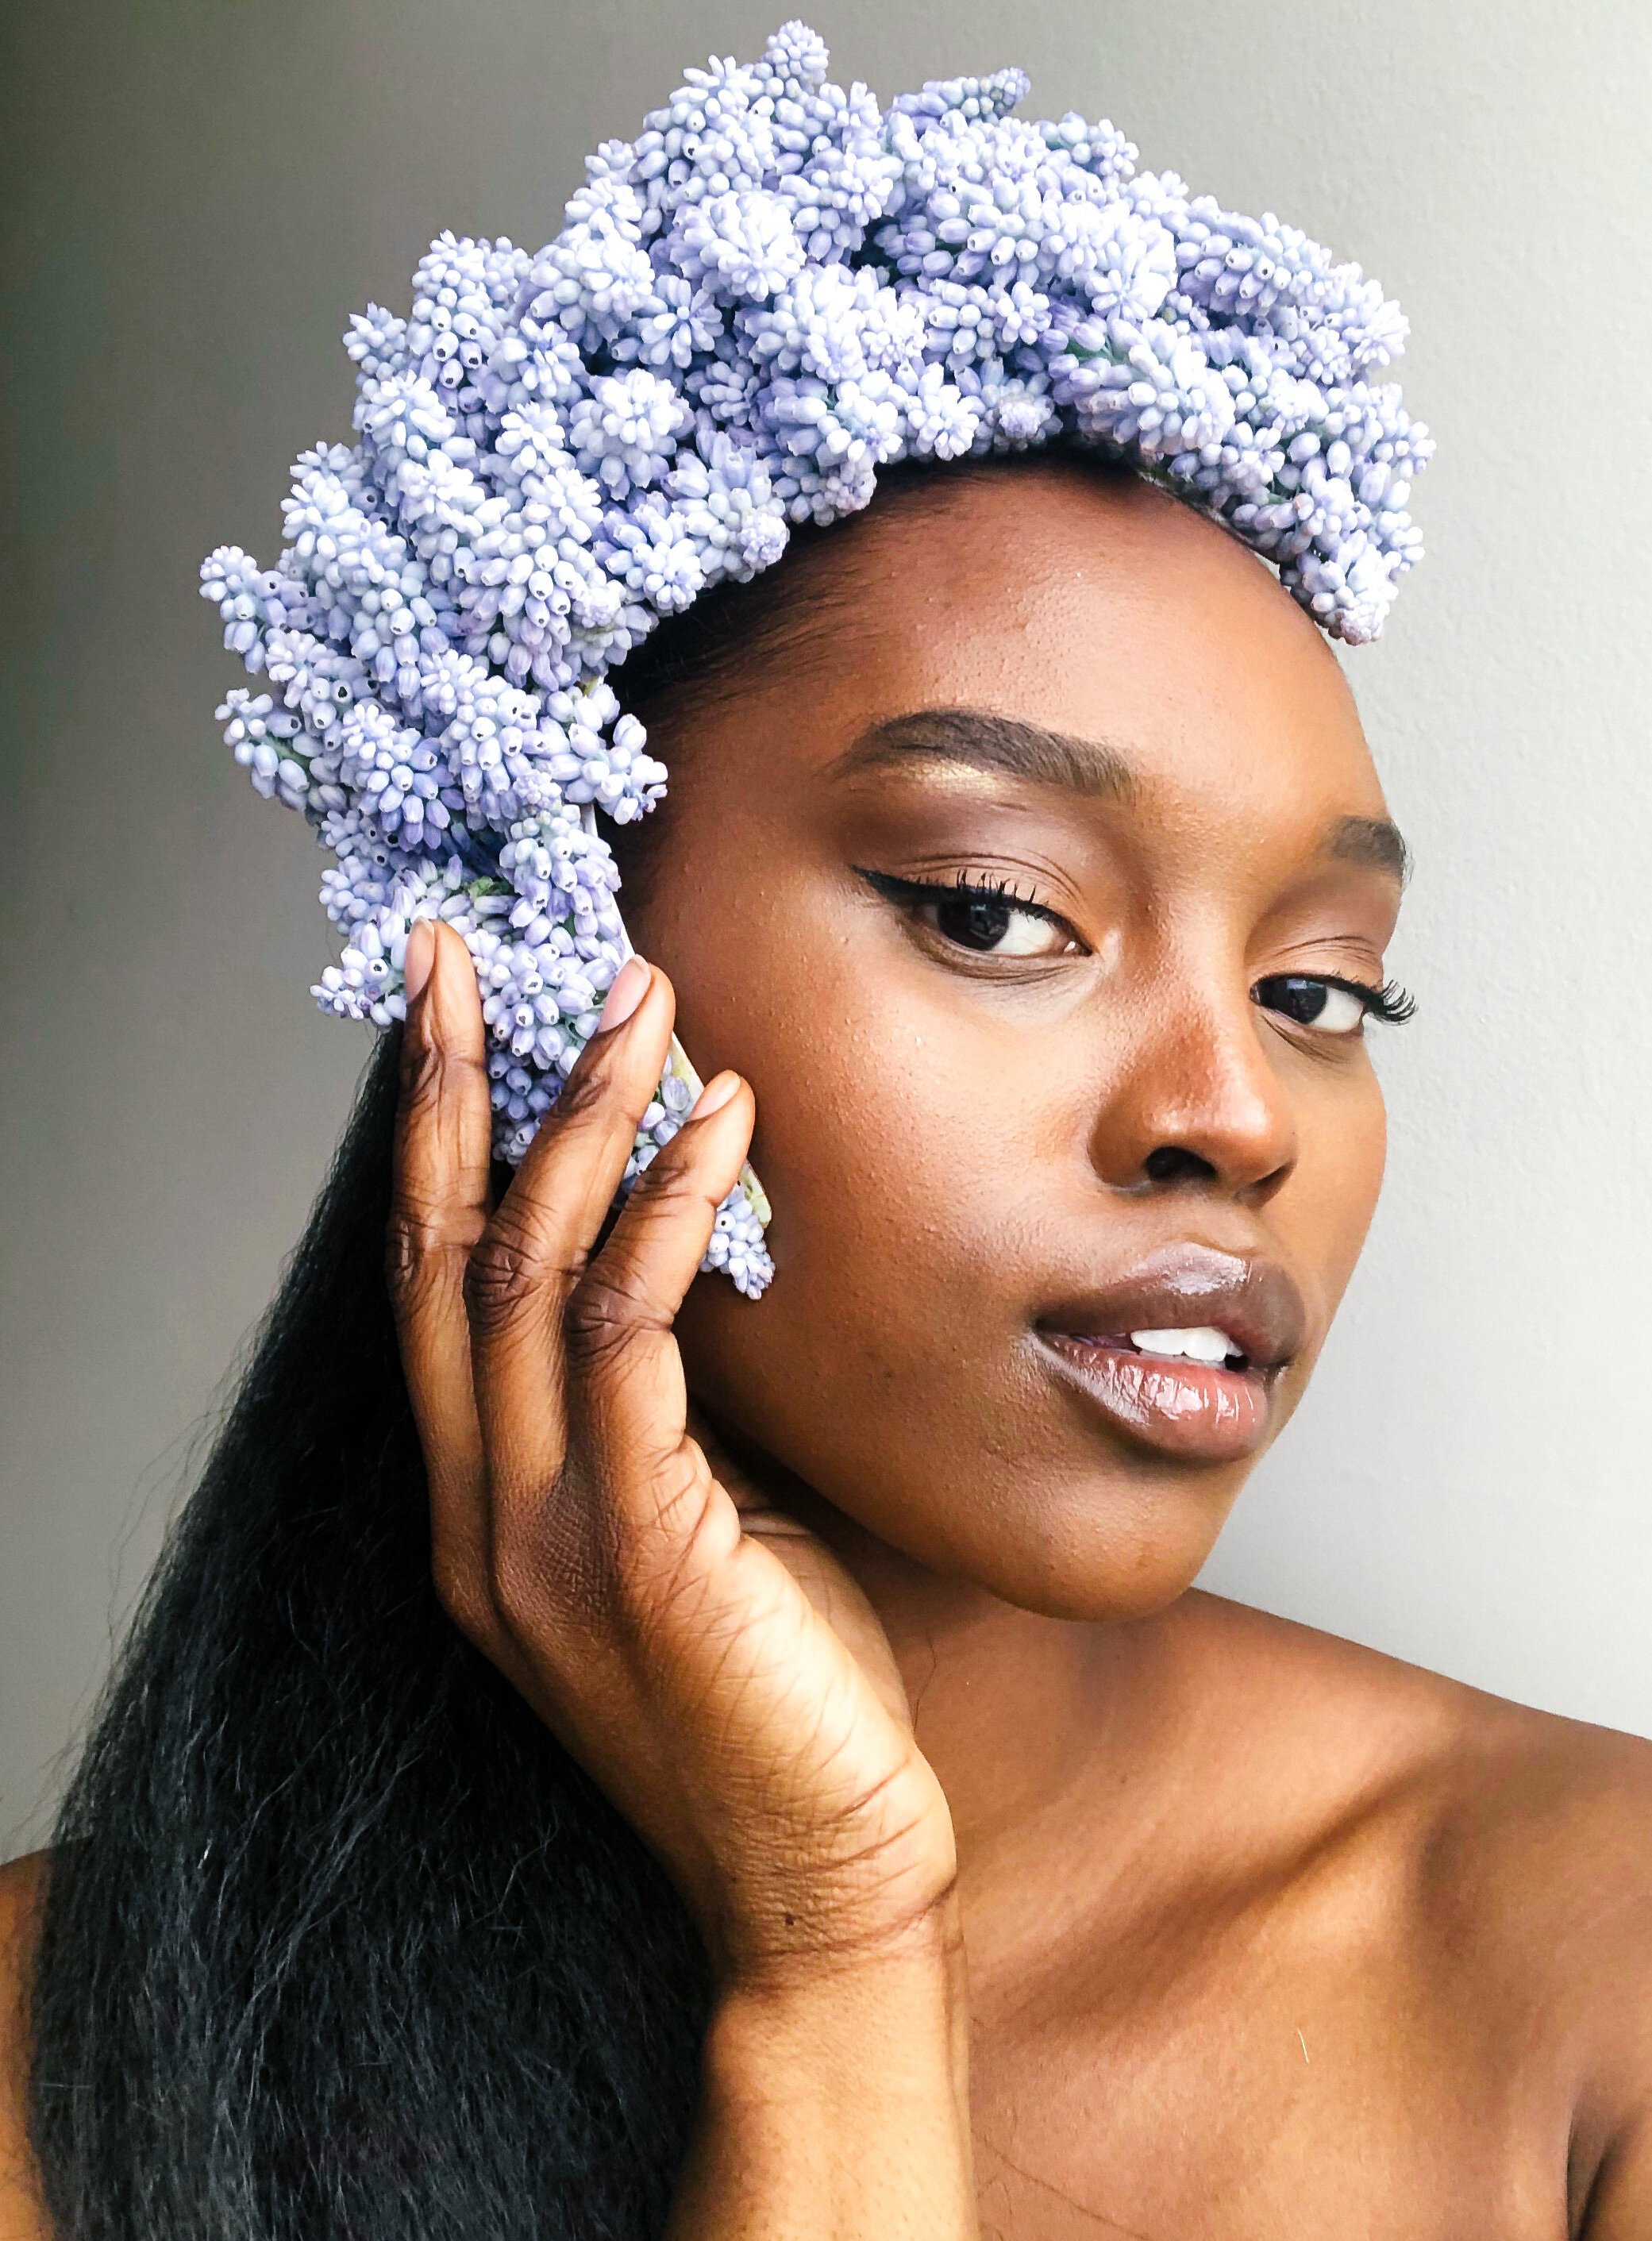
I took this photo of a floral headpiece on the day I made it.
Day Three:
Three days later, after using the Hydration Chamber method described above, the headpiece looks as fresh as day one.
Can this method apply to other floral designs?
Oh yes. In addition to treating the flowers that go into the corsages, boutonnieres, crowns, floral jewelry, and headpieces that I make, I also use this conditioning method to boost the longevity of flowers meant for wired bouquets and large-scale floral installations. Large-scale floral displays for weddings and events have become very popular, and one of my favorite things to do is to skewer or wire flower heads to make floral “spikes” that I place in the hydration chamber to absorb moisture. Prepped and popped into Tupperware containers on Thursday, by Saturday morning, the flowers are plump, and the tubs ready to stack in the van. This allows me the freedom of using these elements without a water source. See my IGTV video for more on how to make a “carnation spike.” I’ve also had success with double tulips, hyacinth, ball dahlia, marigold, chrysanthemum, and double daffodils.
Will you show me how to use a hydration chamber?
I’d love to! I teach about hydration chambers in detail in many of my online classes, and often share behind the scenes on my Instagram and Pinterest accounts. Here is a video of using the hydration chamber on marigolds for confetti NINE DAYS after I cut them. More recently I walked through exactly how to use a hydration chamber with cut muscari for long-lasting results.
Ready to go further?
For more on the hydration chamber, and how to make your own floral wearables, check out my book “The Art of Wearable Flowers,” and my extensive library of self-paced online classes.